This chapter describes the layout and general functions of the main sequencer. Recording, editing clips and events, arranging and working with Blocks in the sequencer are described in detail in the chapters “Recording in the Sequencer”, “Audio Editing in the Sequencer”, “Note and Automation Editing”, “Arranging in the Sequencer” and “Working with Blocks in the Sequencer”.
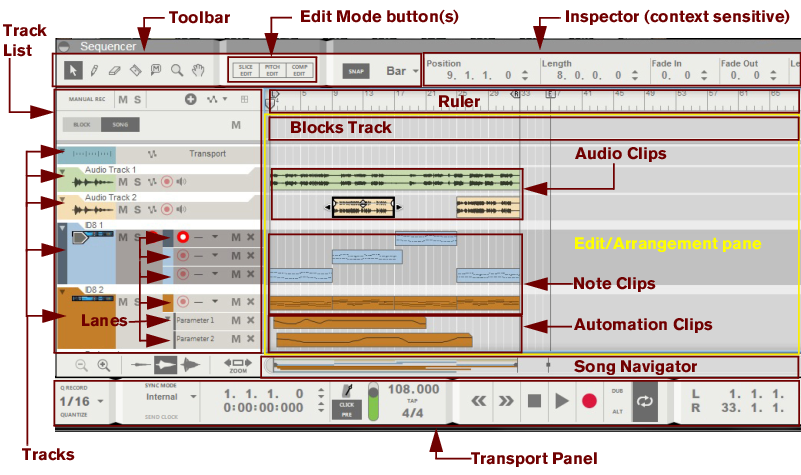
The sequencer is where you record your songs. The sequencer can be used to record audio tracks as well as instrument tracks, performance controllers, parameter automation and pattern automation. You can also arrange your songs, or parts of your songs, in Blocks. In Blocks mode you can build complete “sections” - consisting of a desired number of bars and tracks - that can be reused throughout the song. This chapter mainly describes the Song View and Edit Mode. Functions specific to Blocks and the Blocks View are described in the separate chapter “Working with Blocks in the Sequencer”.
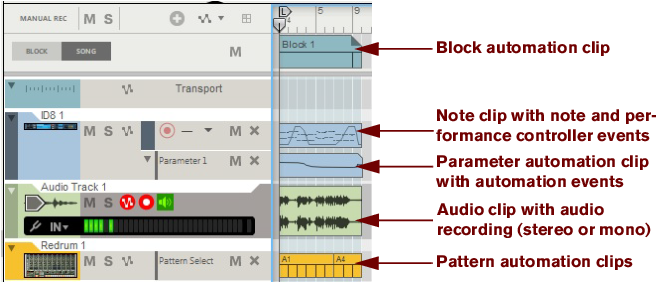
On the Blocks track you arrange the Block automation clips that control which Block should play back (see “Working with Blocks in the Sequencer”).
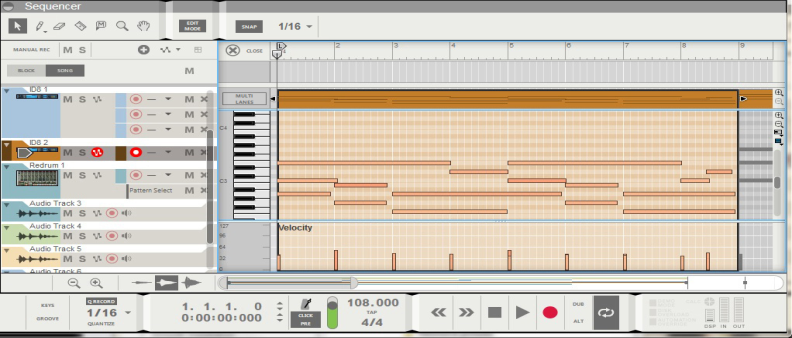
In Edit Mode the Edit Pane shows detailed information about the content of one track (see “Tracks overview”), or lane (see “Lanes overview”) at a time and you can edit the events in individual clips (see “Clips overview”).
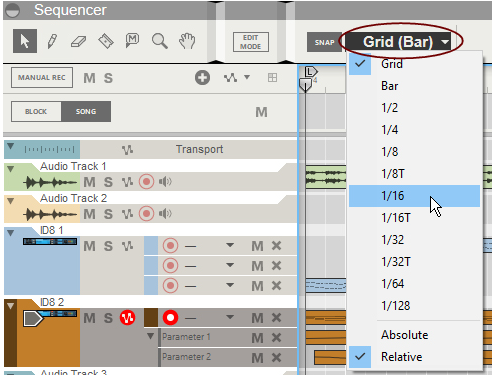
The sequencer Toolbar features various sequencer editing tools as well as the Snap function. The tools can be used in both Edit Mode and the Song/Block Views, with slightly different purposes in the respective modes. See “Toolbar details” for details about each tool.
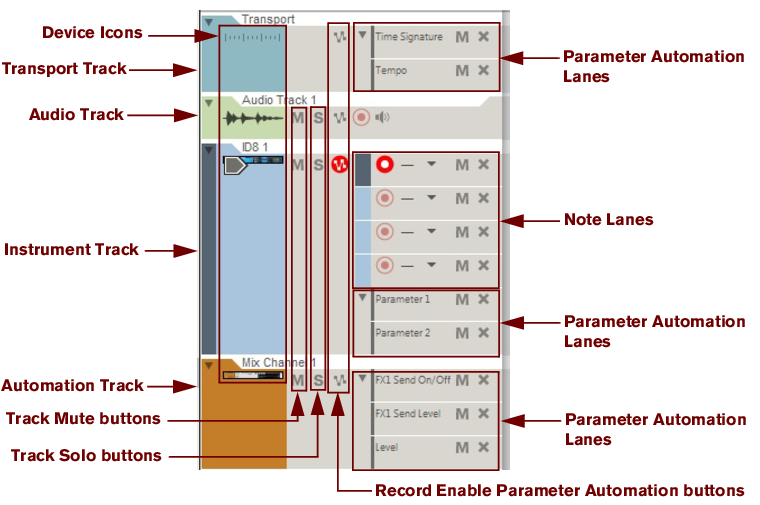
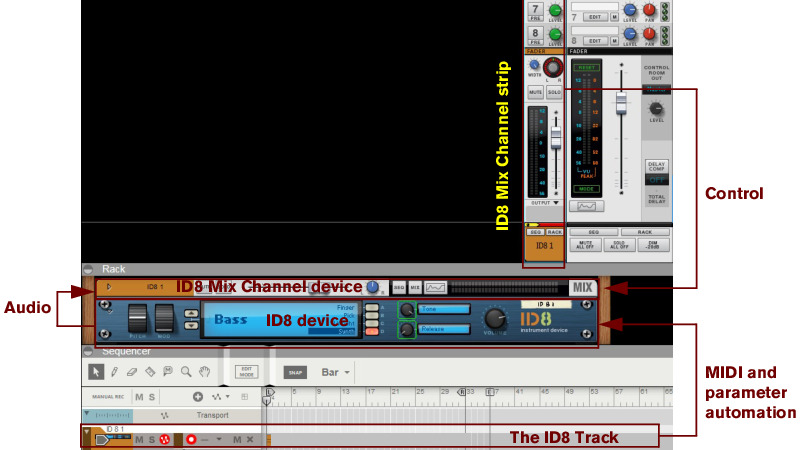
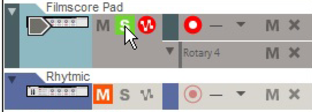
To the left in the sequencer, all tracks are listed in the Track List. Each track in the sequencer is associated with a specific device in the rack. By clicking on a device icon in the Track List you automatically set Master Keyboard Input (see “Setting Master Keyboard Input”) to the corresponding device in the rack for playing and/or recording.
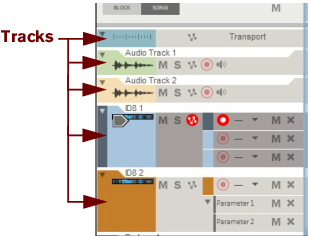
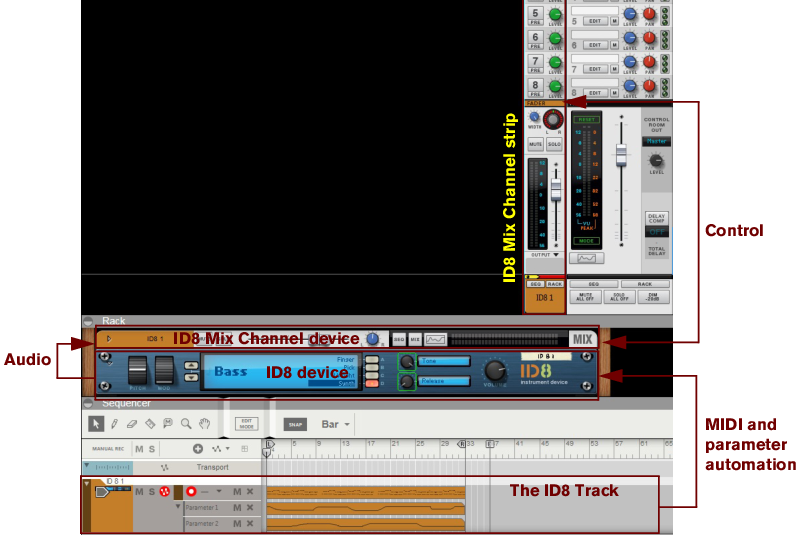
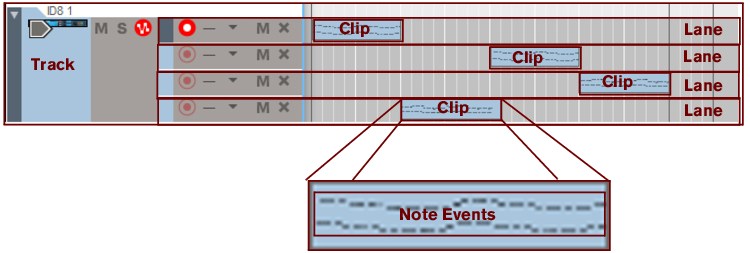
Most rack devices in a song automatically get their own dedicated track in the sequencer when you create the device. Each track can feature one or several lanes on which audio, note, performance controller, pattern and parameter automation events can be recorded - in clips. See “Track details” for more details about tracks.
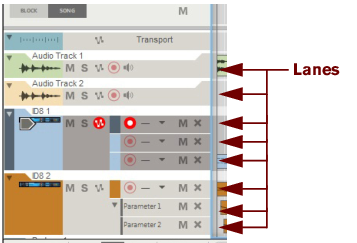
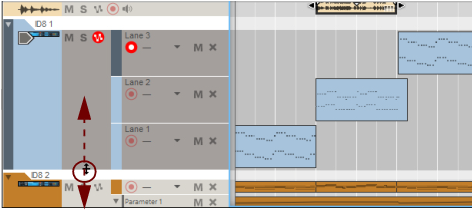
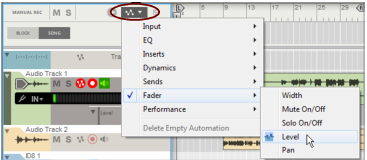
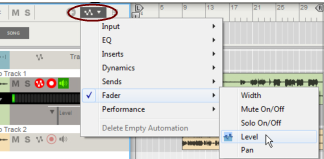
Each track consists of one (default) or several parallel lanes. The lanes can contain clips that feature note events or audio recordings, depending on track type. A track can also feature automation lanes that contain clips with parameter automation events - or pattern automation for pattern based devices. See “Lane details” for more details about lanes.
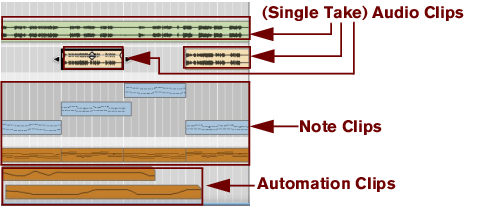
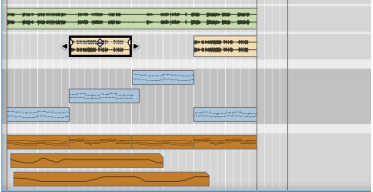
Note, audio, performance controller, pattern and parameter automation events are always contained in clips. A clip is basically a “container” for recorded data. Audio clips are displayed in the Edit/Arrange Pane as a rectangular box with one or two graphical audio waves inside (mono or stereo). Note events are displayed in a “piano roll” fashion in the clip. Performance controllers and parameter automation events are displayed as continuous lines, and pattern events are displayed as repeated rectangles in the clips. See “Clip basics” for information about the different clip types.
The context sensitive Inspector shows the properties of whatever is currently selected in the sequencer: clips, notes, automation events, audio comp rows and cuts etc. The properties of the selected item can be edited by changing the values in the various displays. See “About the Inspector” for more info.
The Ruler is the song’s “time line”, measured in bars. In the Ruler, the Song Position Pointer indicates the current position in the song, i.e. in which bar the song is, or will begin, playing. The Ruler also shows the Left and Right Loop Locators as well as the Song End Marker. See “Ruler details” for more details.
To the far right in the sequencer is the Track scrollbar. With the Track scrollbar you can scroll vertically on the Edit/Arrange Pane. See “Scrolling” and “Zooming in the Sequencer” for more details.
Below the Edit/Arrangement Pane is the Song Navigator. With the Song Navigator you can scroll and zoom horizontally on the Edit/Arrangement Pane. The Song Navigator also features indicators for the Ruler’s Loop Locators, Song Position Pointer and Song End Marker. In the Song Navigator, all clips on all lanes are displayed as colored lines, indicating their positions in the song. See “Scrolling” and “Zooming in the Sequencer” for more details.
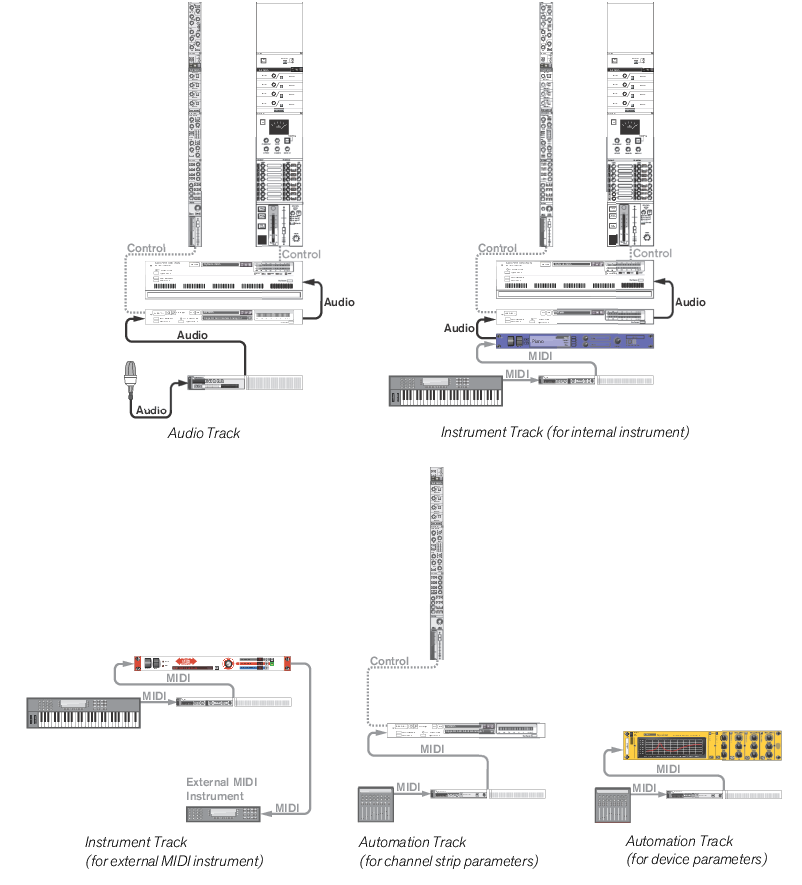
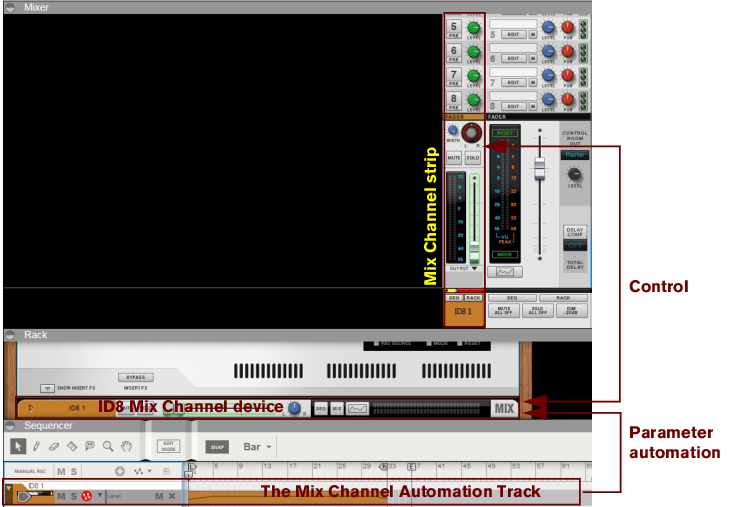
Note that when you create an instrument, the connected Mix Channel device doesn’t automatically get a track in the sequencer. If you want to record Mixer Channel automation, you have to first create a separate sequencer track for the Mix Channel device. See “Automation (non-instrument) track relationships”.
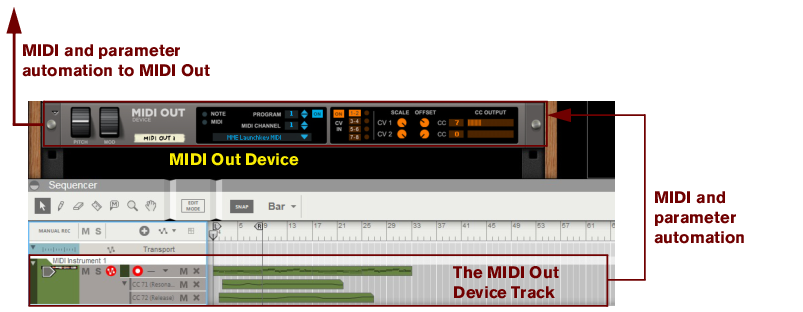
If you want to control an external MIDI instrument from the Reason sequencer you have to use the MIDI Out Device (see “MIDI Out Device”). The device works as a MIDI router in which you can define which MIDI Out Port and MIDI Channel you want the MIDI signals to be sent to from Reason. Since there is no internal audio involved in this setup, there is no Audio Track device or Mix Channel device present in the configuration.
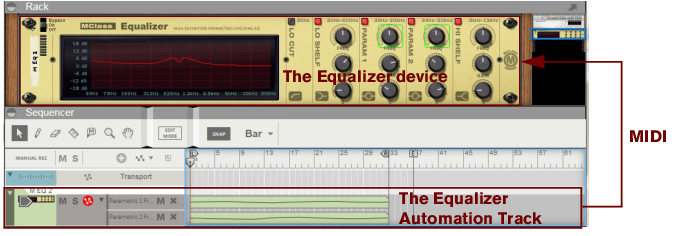
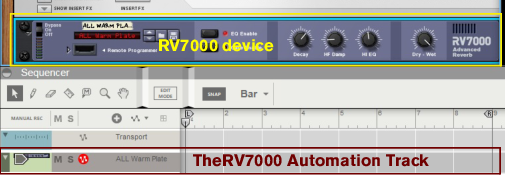
A pure automation track is always associated with a “non-instrument” device, i.e. a device which can’t receive MIDI Note information. Consequently, an automation track can only consist of parameter automation lanes. Examples of non-instrument devices are Mix Channel devices with their corresponding Mix Channel strips, effect devices, mixer devices and Spider Merger & Splitter devices. The picture below shows an example with an automated Mix Channel:
The standard way of routing MIDI from a connected MIDI master keyboard or control surface to a device in the rack is to set the Master Keyboard Input in the sequencer. When MIDI is routed to a selected track in the sequencer, the notes and controller data are automatically echoed to the associated device in the rack. However, it is also possible to set Master Keyboard Input from the rack, see “Playing devices from the rack”.
By locking additional MIDI keyboards to separate devices in the rack, you will be able to play and record on several sequencer tracks simultaneously, see “Locking a surface”.
Besides the standard routing described above, it’s also possible to lock certain rack devices to specific control surfaces. See “Locking a surface” for more details.
It’s also possible to set Master Keyboard Input and track selection independently from each other by selecting “Separated” on the “MIDI” page in Preferences - see “Preferences – MIDI”.
|
•
|
Only one track at a time can have Master Keyboard Input. However, if you have locked additional MIDI keyboards to specific devices in the rack via Remote (see “Locking a surface”), you will be able to play and record these together with the track that has Master Keyboard Input.
|
The Blocks track is present at the top of the Track List only when the Enable Blocks function on the Options menu is on. On the Blocks track you can create Block Automation clips to decide which Blocks should play back. Refer to “Working with Blocks in the Sequencer” for more information about the Blocks feature.
The Transport track is always present at the top of the Track List and cannot be moved or deleted. The Transport Track can have a maximum of two lanes: one containing time signature automation, and the other containing tempo automation. See “Automating time signature” and “Editing tempo automation” for more details.
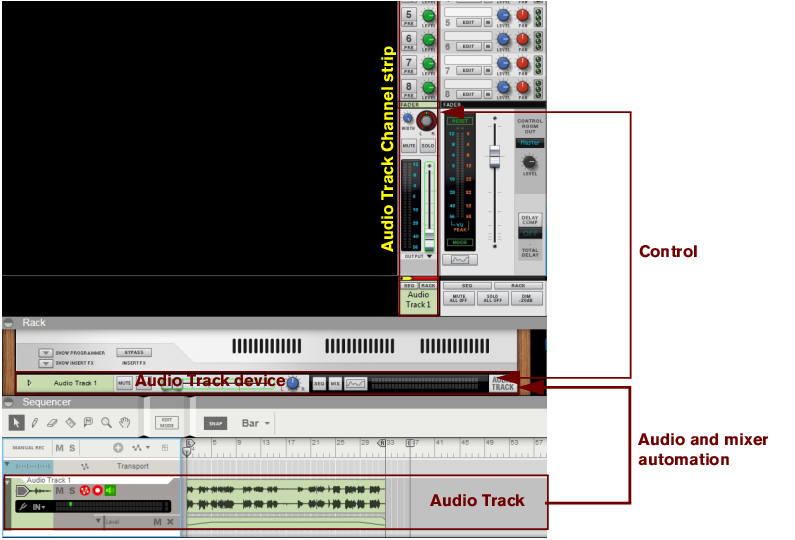
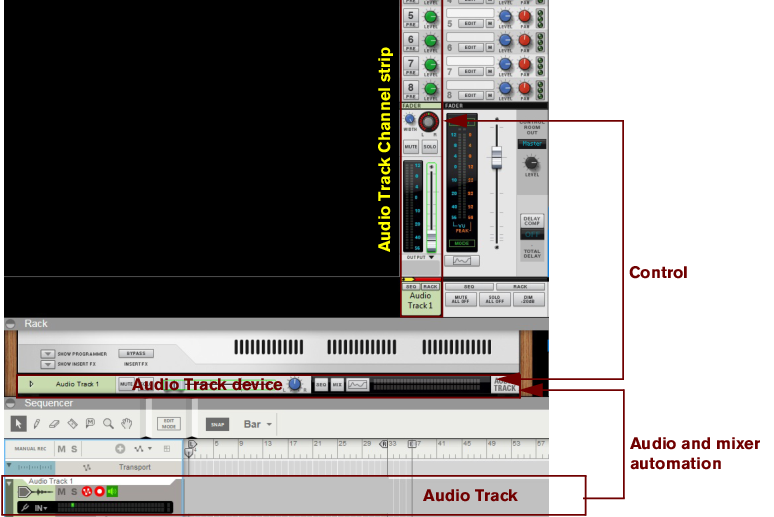
An audio track can only have a single audio lane containing clips with mono or stereo audio recordings. However, each audio clip can contain several recordings, i.e. different "takes". You can view and comp these takes in the Comp Editor. See “Audio Editing in the Sequencer” for more details. An audio track can also have parameter automation lanes containing automation for the Audio Track Channel strip parameters in the Main Mixer.
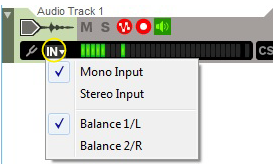
By default, the audio track is set up in mono. You can easily change to stereo by selecting “Stereo Input” in the “Audio Input” drop-down list - see “Selecting audio input(s) and defining mono or stereo”. If you select “Stereo Input”, the Audio Track channel strip in the Main Mixer automatically switches to a stereo channel.
|
|
A MIDI Out Device is created in the rack and the associated track is automatically created in the sequencer. See “MIDI Out Device” for more details on how to configure the MIDI Out Device for controlling external MIDI instruments.
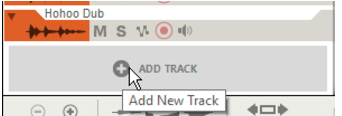
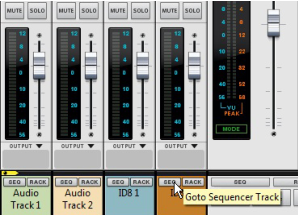
For non-instrument devices, such as effects devices and Mix Channel devices, you need to manually create a track if you want to record parameter automation. You can do that either by following the description below or by following either of the two last descriptions in “Creating/adding parameter automation lanes”.
|
2.
|
See “About Device Groups” for information about device groups.
|
•
|
|
|
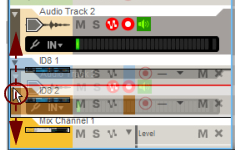
Note that folded tracks (see “Folding tracks”) cannot be resized.
|
See “About Device Groups” for more information about device groups.
The tracks will be deleted without an alert but you can always use the Undo function. See “Undo and Redo”.
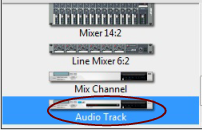
If you have deleted a track for a device and want to create a new track for the device, follow the descriptions in “Creating a parameter automation track for a non-instrument device” or “Short-cut for creating a Mix Channel track or Audio track”.
See “About Device Groups” for more information about device groups.
|
|
The track color is shown in the track background in the Track List. The associated Audio Track device or Mix Channel device in the rack and its corresponding channel strip in the Main Mixer will also be assigned the new color. The selected track color will be reflected in all new clips you record or draw on this track.
|
|
See “About Device Groups” for more information about device groups.
|
|
|
|
|
|
|
|
In Tuner mode, you can tune a connected instrument - an electric guitar, for example. See “Using the Tuner” for more info.
To the right of the Tuner button is the Select Audio Input drop-down list. Here, you select which audio input(s) to use for the track. See “Selecting audio input(s) and defining mono or stereo” for more info.
The Input Meter shows the level(s) of the input signal(s). If the selected audio input is mono, the Input Meter displays a single LED bar. If the audio input is in stereo, the Input Meter displays two parallel LED bars. See “Setting input level(s)” for details about setting input levels.
|
•
|
To the right of the “Record Enable” button is the “Groove Select” drop-down list. Here you can select a ReGroove channel for all clips on the lane. See more about ReGroove in “The ReGroove Mixer”.
|
•
|
To the far right is the “Delete Automation Lane” (X) button. Clicking this button will delete the lane (and all clips on it). If there are clips on the lane, a dialog appears prompting you to confirm deletion. See “Deleting parameter automation lanes” for alternative ways of deleting parameter automation lanes.
|
•
|
To the far right is the “Delete Pattern Lane” (X) button. Clicking this button will delete the lane (and all clips on it). If there are clips on the lane, a dialog appears prompting you to confirm deletion. See “Deleting pattern lanes” for alternative ways of deleting pattern lanes.
|
•
|
A new note lane will be created and automatically record enabled. See “Recording notes using the “Dub” and “Alt” functions” for more details.
A new note lane will be created and automatically record enabled. At the same time, the previous note lane, or (if loop is activated and the Song Position Pointer is between the Left and Right Locators) the clips between the Left and Right Locators, will be muted. See “Recording notes using the “Dub” and “Alt” functions” for more details.
|
•
|
|
|
Only the basic properties and functions pertaining to clips are described here. See “Arranging in the Sequencer” for in-depth details about what you can do with clips.
|
|
The Mute Tool is used for muting clips in the arrangement - or lanes in Block automation clips (see “Muting lanes in Block Automation Clips”).
|
|
|
|
The Speaker Tool is used for auditioning slices or notes in Single Take audio clips, and for auditioning individual recordings on Comp Rows in Comp Clips. See “Slice Edit mode tools”, “Auditioning notes” and “Comp Editor audio editing tools” for details.
#Snap
|
|
However, there’s one exception: If a note clip is open in Edit Mode and you click in the Clip Overview (see “Edit Mode elements”), the clip will remain open but the Snap value for arranging will be selected. This allows you to e.g. move or resize the clip in the Clip Overview just like in the Song/Blocks View, without closing it first.
|
| Function
|
|
You can change the positions of the Song Position Pointer, Locators and Marker in the Ruler by clicking and dragging them to desired positions in the Ruler. Note that you have to click and drag the “flags” in the Ruler - not the lines. The Song Position Pointer and Loop Locators can also be moved by typing in new positions in the respective Position displays in the Sequencer Transport Panel (see “Song Position” and “Left and Right Locator Positions”). Another way of moving the Song Position Pointer is by using the Rewind and Fast Forward controls on the sequencer Transport Panel (see “Rewind and Fast Forward”).
#Keys
See the “On-screen Piano Keys” chapter for more information.
Refer to “The ReGroove Mixer” chapter for more information.
When the Q Record button is on, all recorded MIDI notes will be quantized to the currently selected quantization grid. Refer to “Quantize” for more information on quantization.
Refer to “Quantize” for more information on quantization.
Refer to “Quantize” for more information on quantization.
Here you can set the desired synchronization mode for the Reason sequencer: Internal, MIDI Clock (if applicable) or Ableton Link (if applicable). You can also choose “Send MIDI Clock” to sync other applications/instruments from Reason (if applicable). See the chapter “Synchronization and Advanced MIDI” for more information about synchronization.
The current song position is shown in the display. The song position is where the Song Position Pointer in the Ruler (see Ruler details) is at the moment. The display is divided into Bars, Beats, 1/16th Note and Ticks (there are 240 Ticks for each 16th note) segments. You can edit the position of the Song Position Pointer, and thus change the song playback position, according to the descriptions in “Transport Panel segment displays”.
The current position of the Song Position Pointer in the Ruler (see Ruler details) is shown in time format (hours, minutes, seconds and milliseconds) in the display. You can change the position in time of the Song Position Pointer, and thus change the song playback time position, according to the descriptions in “Transport Panel segment displays”.
The click will sound on every beat, with the first beat in every bar accented (higher pitched). See “Click and Pre-count” for more details.
Pre-count will only be present before recording - not before regular playback. See “Click and Pre-count” for details about selecting number of pre-count bars etc.
See “Click and Pre-count” for more details.
The current song tempo is shown in the display in BPM (Beats Per Minute) and 1/1000 of a BPM. You can edit the tempo according to the descriptions in “Transport Panel segment displays”. The Tempo range is 1.000-999.999 BPM.
The current song time signature is shown in the display. You can edit the time signature according to the descriptions in “Transport Panel segment displays”.
|
•
|
|
•
|
Alternatively, press [*] on the numeric keypad or hold down [Ctrl](Win) or [Cmd](Mac) and press [Return] on the computer keyboard. If Pre-count has been activated (see Pre(-count) On/Off above), the recording will begin after the set number of pre-count bars.
Clicking on any of these buttons will add additional audio tracks or note lanes for overdub purposes. Refer to “Overdubbing audio using the “Dub” function” and “Recording notes using the “Dub” and “Alt” functions” for more details about these functions.
The current positions of the Left and Right Locators in the Ruler (see Ruler details) are shown in the displays. The display is divided into Bar, Beat, 1/16th Note and Ticks (there are 240 Ticks for each 1/16th Note). You can change the positions of the Locators, and thus change the loop playback region, according to the descriptions in “Transport Panel segment displays”.
|
| Function
|
|
The Inspector, located above the Edit/Arrangement Pane, can be used for a number of different editing purposes pertaining to clips, events and recordings. The Inspector is context sensitive, meaning it will have different content and functionality depending on what is currently selected. How to edit using the Inspector is described in detail in the sections “Resizing clips using the Inspector”, “Moving clips using the Inspector”, “Editing recordings and cuts in the Inspector” and “Editing notes and events in the Inspector”.
The “Match Values” function in the Inspector can be used to match the positions, lengths and/or values of several selected clips, notes, events or recordings to the position, length and/or value of the topmost (or leftmost) selected clip, note, event or recording. Refer to “Matching clips using the “Match Values” function”, “Matching audio values using the "Match Values" function” and “Matching notes or events using the “Match Values” function”.
