This chapter describes how to edit note and parameter automation events after they have been recorded in the sequencer. It also describes how to manually create note and automation events in clips. General sequencer functions, recording, editing audio, arranging in the sequencer and working with Blocks are described in detail in the chapters “Sequencer Functions”, “Recording in the Sequencer”, “Audio Editing in the Sequencer”, “Arranging in the Sequencer” and “Working with Blocks in the Sequencer”.

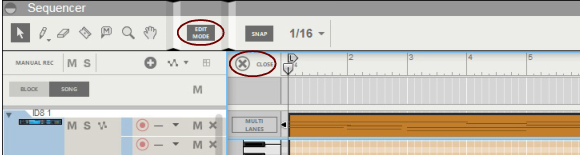
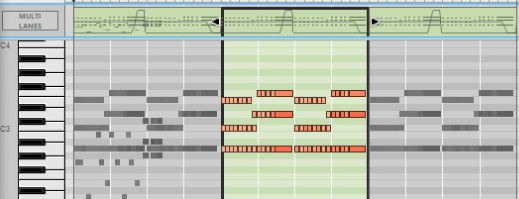
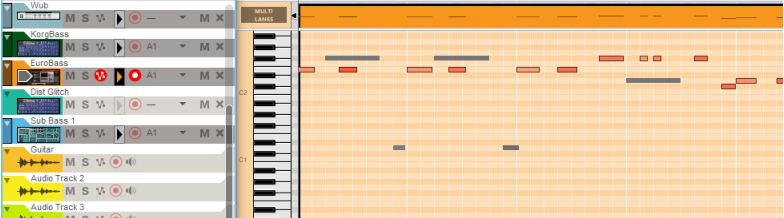
The Edit Mode shows the contents of a single lane at a time on the Edit Pane - unless you use the Multi Lanes function, described in “Multi Lanes editing”, where you can see the contents of multiple note lanes in a “ghosted” fashion underneath the currently open clip. On instrument tracks, only one note lane can have edit focus at a time.
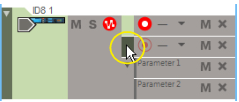
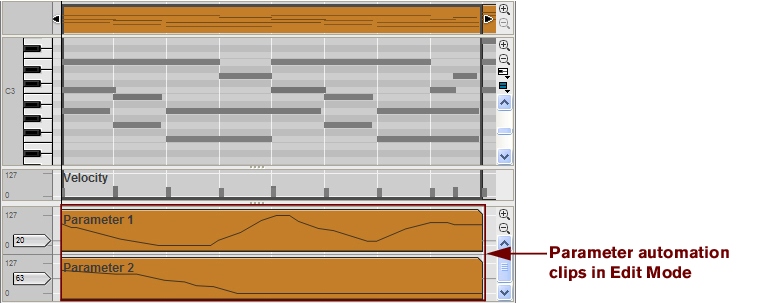
Also, all parameter automation lanes will be shown at the bottom of the Edit Pane. If a single clip was selected on the note lane with edit focus when you switched to Edit Mode, it will automatically be opened. If no clip was selected, the events will be grayed out. To be able to edit or draw notes and/or automation events, you need to open the clip, for example by double-clicking it (see “Opening note and automation clips for editing”).
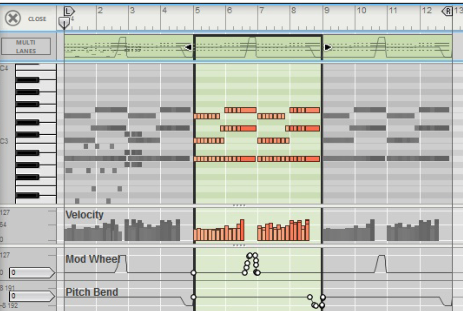
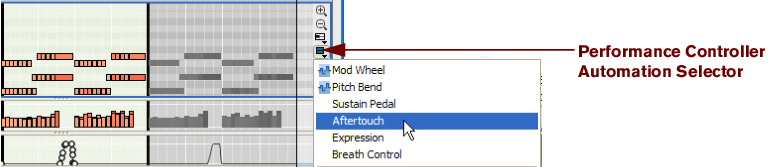
Note clips can contain both note events - with velocity values - and performance controller events. By default, performance controllers include Mod Wheel, Pitch Bend, Sustain Pedal, Aftertouch, Expression and Breath Controller. However, the controller configuration can easily be changed (see “Creating new performance controller automation lanes” and “Deleting performance controller automation lanes”).


See “Editing parameter automation in the Song/Block View” for information on how to edit parameter automation events in the Song/Block View.

See “Editing parameter automation in Edit Mode” for information on how to edit parameter automation events in Edit Mode.
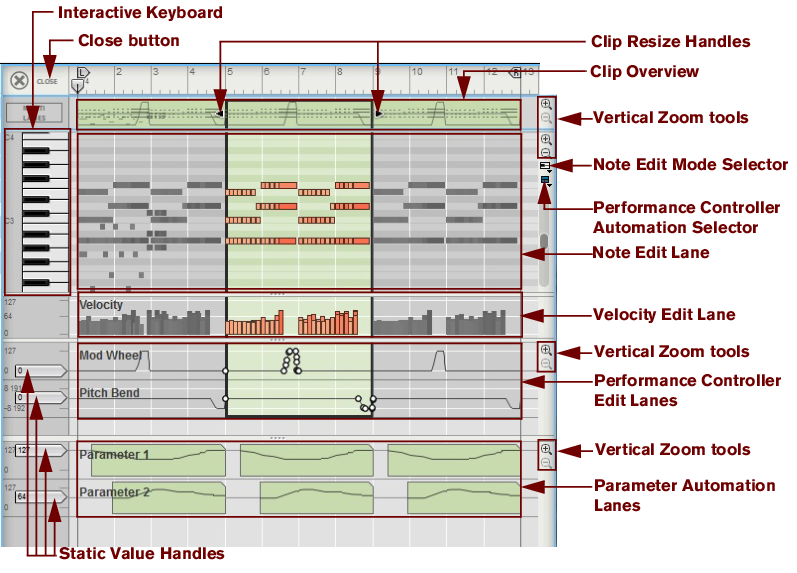
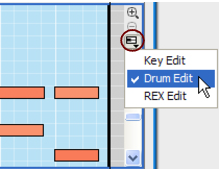
To the right of the Note Edit Lane, below the Vertical Zoom tools, is the Note Edit Mode Selector. Click to choose between Key Edit, Drum Edit or REX Edit Mode. Depending on selected mode, the Note Edit Lane will display differently. See more about the different modes in “Note Edit Modes”.
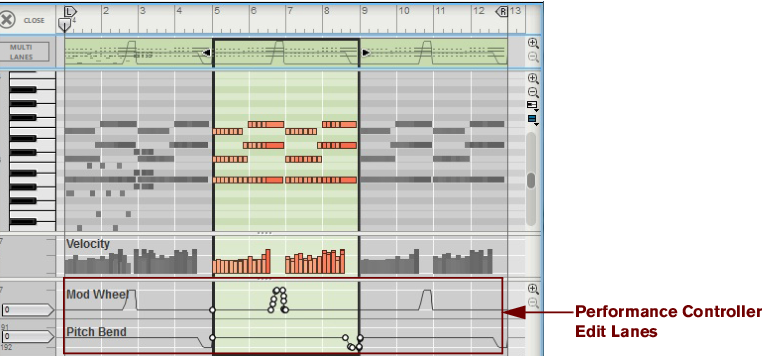
Each performance controller you used when recording the note clip has its own separate Performance Controller Edit Lane. You can add or delete performance controller edit lanes from the clip using this selector. See the “Creating new performance controller automation lanes” and “Deleting performance controller automation lanes” for more details.
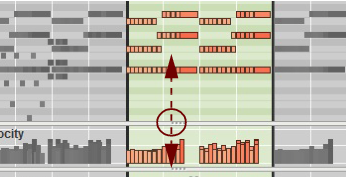
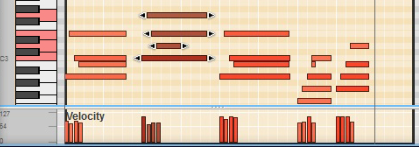
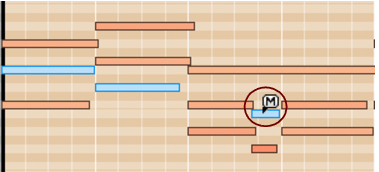
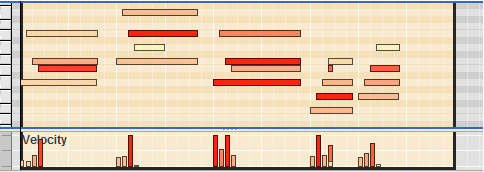
Here you can edit the notes of one open clip at a time. Note events are displayed as orange horizontal “boxes” in a piano roll fashion on the Note Edit Lane. The left side of each box indicates Note On (key down) and the right side Note Off (key up). The color intensity of each box indicates the velocity for the corresponding note. Depending on selected Note Edit Mode (see “Note Edit Modes”), the contents of the Note Edit Lane will display differently.
The Velocity Edit Lane shows the velocity values for each of the recorded notes. Velocity values are automatically recorded together with notes. See more about editing velocity values in “Editing note velocity”.
On the Performance Controller Edit Lanes are the performance controller events for Mod Wheel, Pitch Bend, Sustain Pedal etc. Performance controller events are automatically distributed on separate lanes for each recognized controller during recording. Even though performance controllers belong to separate note clips, they will affect all active parallel note lanes on a track. See “Automation editing” for details on how to edit performance controller events.
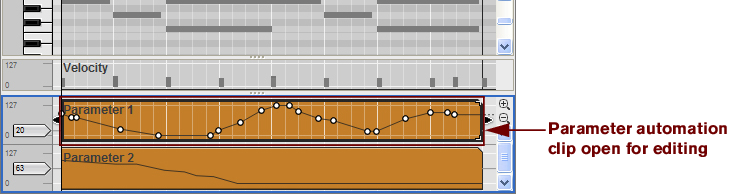
Any recorded parameter automation will be shown in separate clips, on separate Parameter Automation Lanes. Parameter automation clips don’t “belong” to the note lane or to any note clips, and will not be opened together with note clips. Double-clicking on a parameter automation clip will open it for editing. See “Automation editing”.
The Static Value Handles to the left of the Performance Controller Edit Lanes and Parameter Automation Lanes indicate to what value the automated controller/parameter will default to where there are no clips on the lane. Basically, this value reflects the parameter’s initial value, before it was automated. You can easily change a parameter’s Static Value by dragging the Static Value Handle up or down. See “Automation editing” for more details.
|
|
|
|
|
|
|
•
|
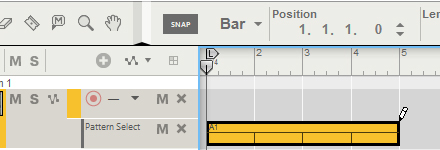
If you want to create a note clip, draw it on a note lane. If you want to create a parameter automation clip, draw it on a parameter automation lane. If Snap is activated, the clip start and end boundaries will snap to the set Snap value (see “Snap”).

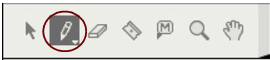
Notes can be edited using the mouse in Edit Mode. It’s also possible to edit notes by using the functions on the Tools tab in the Tool Window. Notes can also be numerically edited in the Inspector, as described in “Note and automation editing in the Inspector”.

|
|
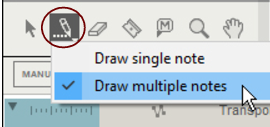
If you want to restrict note input to certain note values (e.g. 1/16th notes), activate Snap (see “Snap”) and set the snap value accordingly.
|
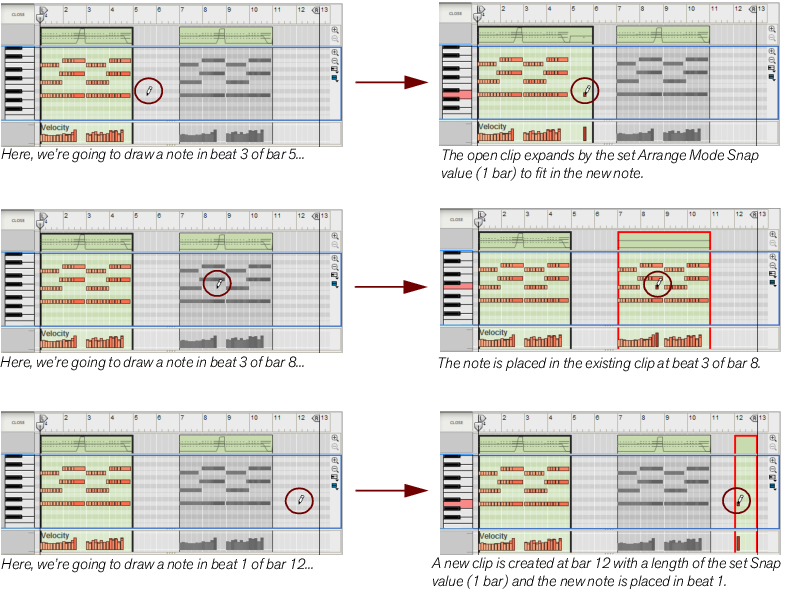
A note will be inserted at the closest Snap value position. By default, the note will be given the Velocity value ‘100’. (This can be edited afterwards according to the descriptions in “Editing note velocity”). If an open or closed clip is already present on the Note Lane, at the position where you draw the note, the note will be placed in that clip. If no clip is available, refer to “About drawing notes outside an open clip” and “About drawing notes outside a closed clip” below.
If Snap is off, the note will get the length of the shortest possible Snap value, i.e. 1/128th note.
|
|
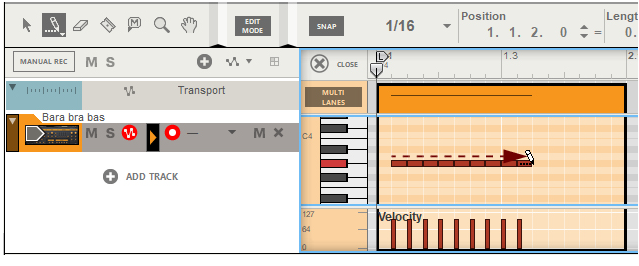
Multiple notes of the currently selected Snap value length are now added after one another (at the same pitch) in the note clip. By default, the notes will be given the Velocity value ‘100’. (This can be edited afterwards according to the descriptions in “Editing note velocity”).

|
•
|
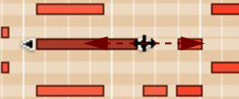
If Snap is on (see “Snap”), the beginning and/or end of the note will be magnetic to the (absolute) Snap value positions.
|
You can also edit the length of notes numerically in the inspector. See “Note and automation editing in the Inspector”.

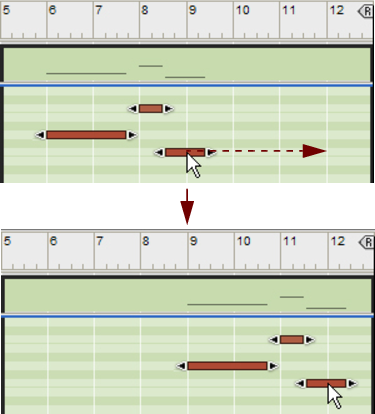
If several notes are selected, all will be moved. If Snap is on (see “Snap”), the moved events will keep their relative distance to the Snap value positions - or will be moved to new positions on an absolute grid - depending on whether you have selected “Absolute” or “Relative” in the Snap value list.
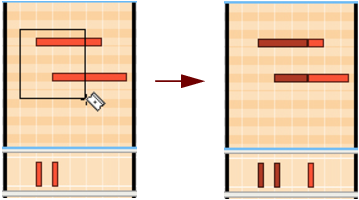
If you nudge notes outside the boundaries of an open clip, the notes will belong to the open clip, but become masked since they are nudged outside the clip boundaries. The “Keep Events in Clip While Editing” setting has no effect when nudging notes. If you want to move notes between clips, or to a new clip, you have to do that using the Selection Tool as described in “About moving notes outside or between clips”.
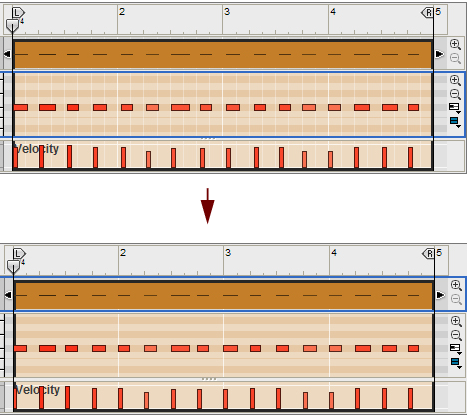
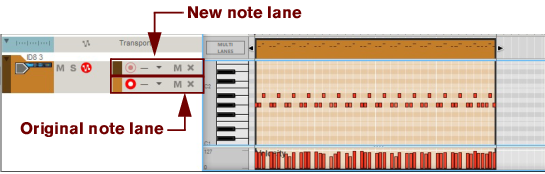
It’s possible to move defined notes in a clip to new clips on new, additional lanes. See “Extract Notes to Lanes”.
You can also edit the note positions and pitches numerically in the inspector. See “Note and automation editing in the Inspector”.
|
|
It’s possible to duplicate defined notes in a clip and automatically place them on new, additional lanes. See “Extract Notes to Lanes”.
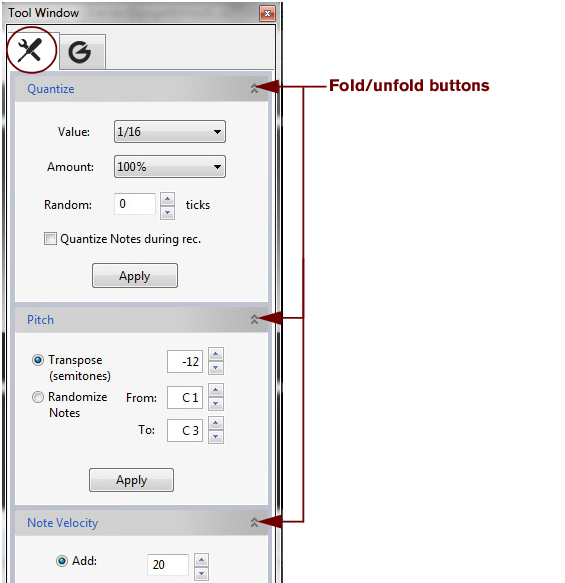
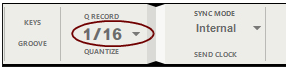
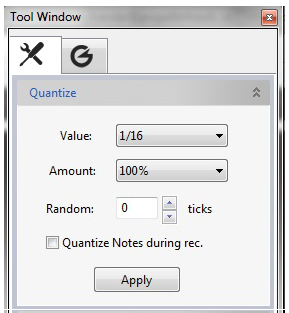
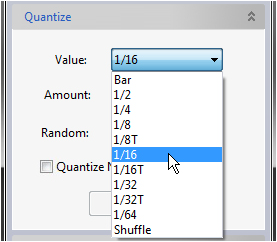
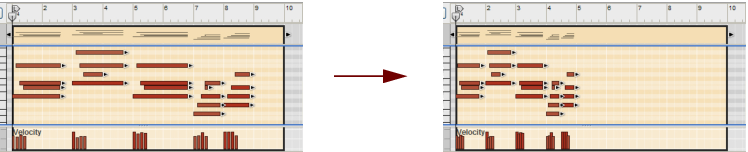
The “Quantize” function on the Transport Panel and on the Sequencer Tools tab in the Tool Window is normally used for applying quantization to notes - but can also be used for quantizing recorded audio. Clicking the Quantize or Apply button will automatically align the start positions of the selected notes or audio slices to a pre-defined, absolute grid. You can also choose to automatically quantize MIDI notes as they are being recorded - see “Quantizing notes during recording”.

A more flexible way of doing this for notes and note clips is to use the ReGroove mixer - see “The ReGroove Mixer” chapter for details.


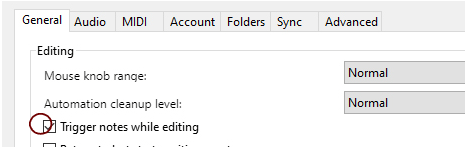
Any notes recorded after having activated this function will be automatically quantized to the current settings on the “Quantize” pane in the Tool Window, see “Quantize”.
|
|
|
|
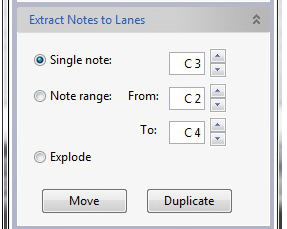
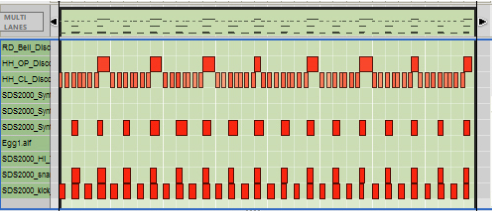
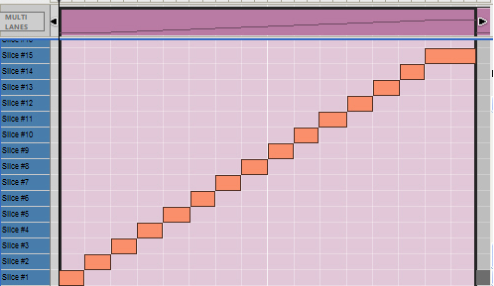
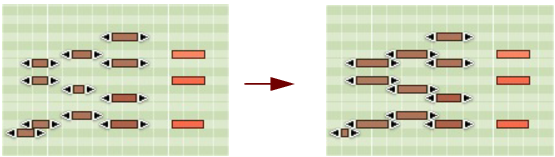
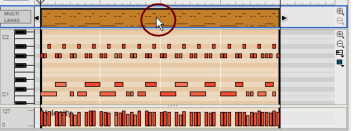
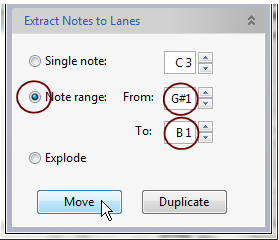
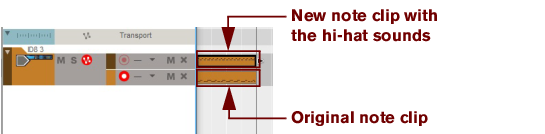
The “Extract Notes to Lanes” function on the Sequencer Tools tab in the Tool Window is used for moving or duplicating user-defined notes of a certain pitch, or notes within a defined pitch range, to a new note clip on a new, additional note lane. This function is very useful if you, for example, have recorded a drum track, with all notes in the same clip, and then want to extract individual drum sounds (note pitches in this case) to separate lanes to be able to edit them more easily - or to apply ReGroove channels (see “The ReGroove Mixer”).
Since the Extract Notes to Lanes function applies to selected clips and not to selected notes, you have to click in the Clip Overview to enable the function. (In the Song/Block View, you just select the clip by clicking on it).

|
|
You can also edit velocity values numerically in the Inspector. See “Note and automation editing in the Inspector”.
This is done in the Song/Block View. If the clips are on the same lane, it can also be done in the Comp Editor. See “Reversing audio clips” for more details about reversing audio clips.
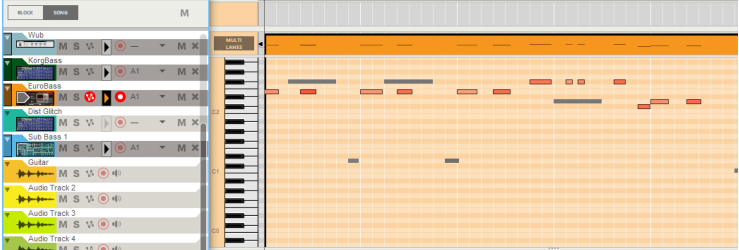
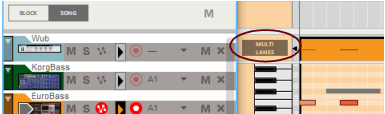
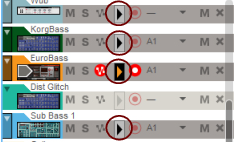
The easiest ways of selecting what note lanes should be available for Multi Lanes editing are these:

|
|
With the Multi Lanes editing feature, the functions “Move/Duplicate Selected Notes to New Lane” and “Extract Notes to Lanes” are very useful, especially when working with drum tracks.
|


|
•
|
|
•
|
|
|

Here you can edit the parameter’s Static Value (see “Static Value Handles”) with the up/down arrow buttons to the left of the open clip. Alternatively, double-click and type in a new Static Value in the box.
In the open parameter automation clip, it’s possible to move, add and delete automation events in the same way as in Edit Mode using the Selection (Arrow), Pencil and Eraser tools - see “Editing parameter automation in Edit Mode”.
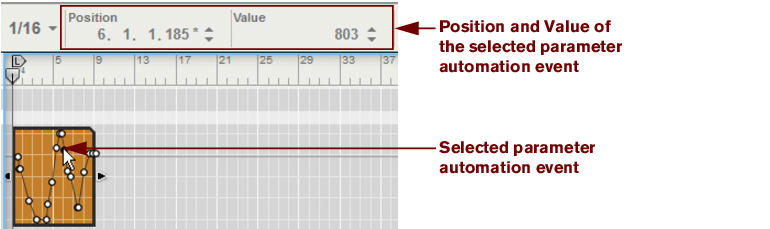
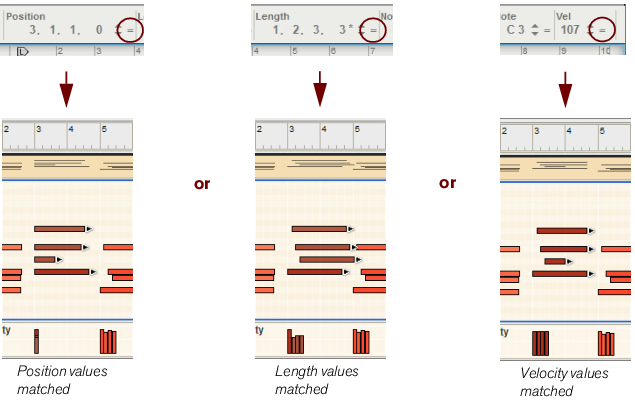
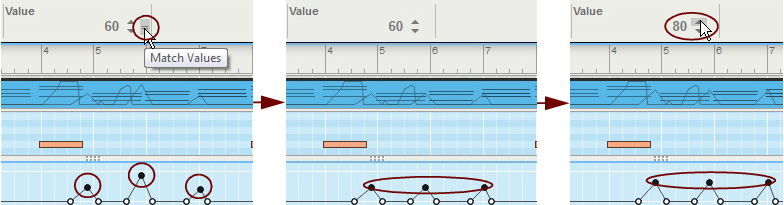
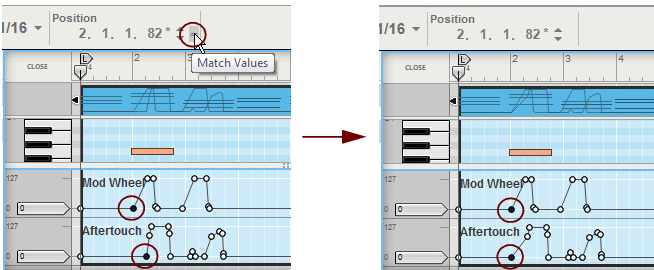
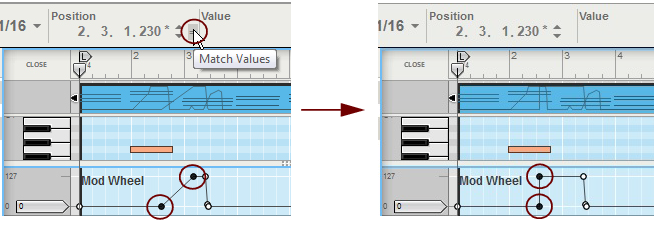
The event’s position and value can be edited numerically in the displays - see “Note and automation editing in the Inspector”.


|
|
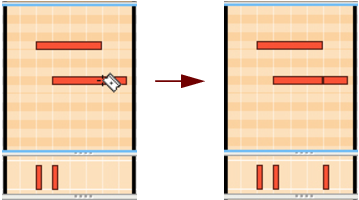
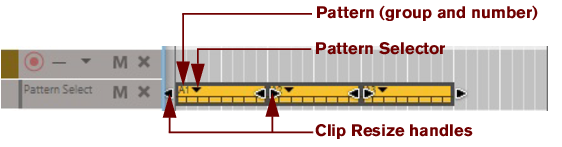
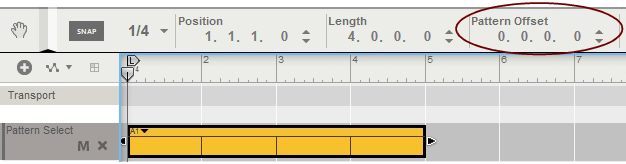
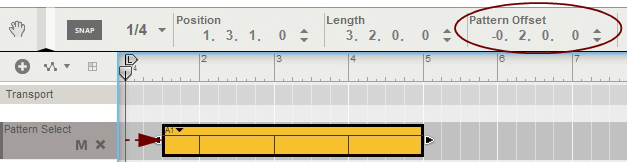
When moving automation events with the Selection (Arrow) Tool, Snap (see “Snap”) is taken into account if enabled. You can also resize the clip by dragging the clip handles.
|
|
These values can be edited numerically in the Inspector displays. See “Note and automation editing in the Inspector”.
If you move parameter automation events outside the boundaries of an open clip, the same rules apply as when moving note events outside an open clip. See “About moving notes outside or between clips”.
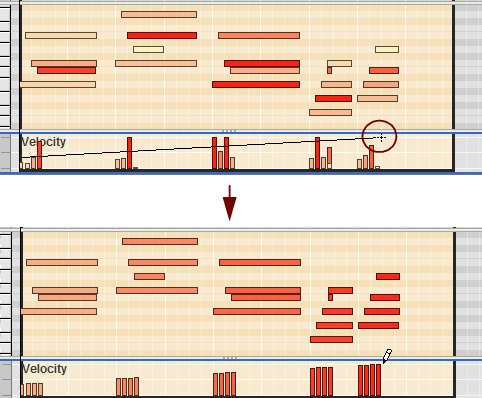
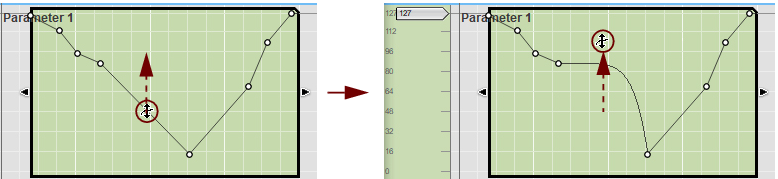
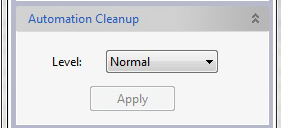
When dragging, the resulting curve (i.e. the number of points) depends on two factors; the selected “Automation Cleanup” setting in the Preferences menu (see “About Automation Cleanup”), and the snap value if Snap is activated (see “Snap”).
Note that if the automation line is curved (see “Creating curves between automation points”), the line will become straight (not curved) to the right of the added point.

If you draw parameter automation events outside the boundaries of an open clip, the same rules apply as when drawing note events outside an open clip. See “About drawing notes outside an open clip”.

|
|
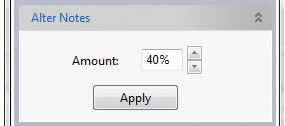
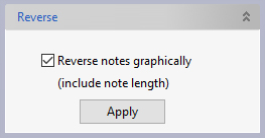
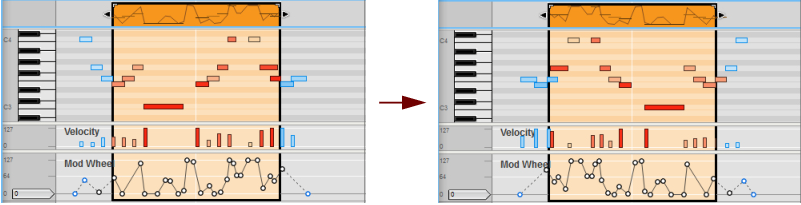
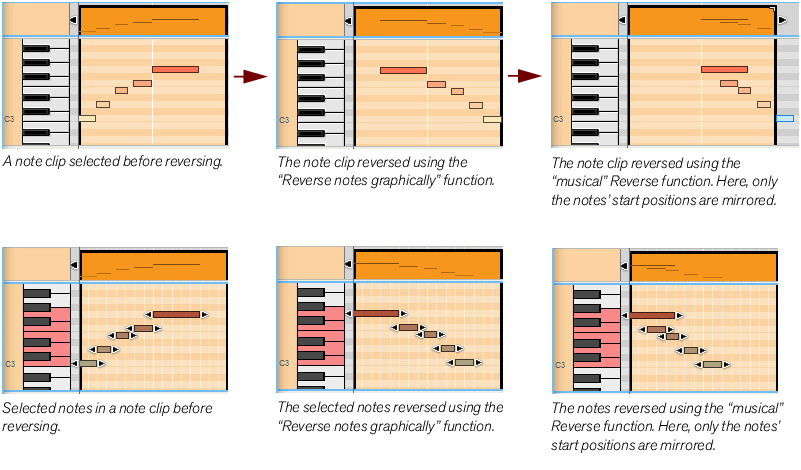
It’s possible to reverse the order of selected automation events in an open note or automation clip, see “Reverse”.
|
|

|
4.
|
Afterwards, you can edit the performance controller events the same way as with regular parameter automation events (see “Editing parameter automation in Edit Mode”).
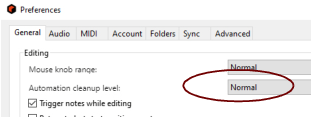
This automatically removes superfluous automation events next time you record or draw events and simplifies the curves. Note that Snap (see “Snap”) also governs the number of events when drawing events.

|
1.
|
However, it is recommended that Snap is activated (and in most cases set to “Bar”) when you do this (see “Snap”).
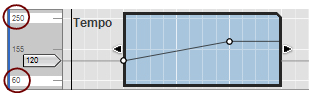
Tempo automation is edited in the same way as regular parameter automation. See “Editing parameter automation”.
Drawing tempo automation events is done in the same way as drawing regular parameter automation events. See “Drawing parameter automation events”.
|
|
|
|
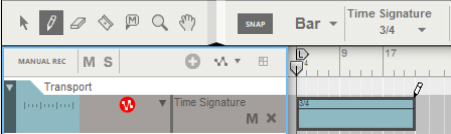
It is generally a good idea to activate Snap (see “Snap”) and have the Snap value set to “Bar” when drawing clips.
|
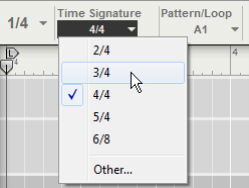
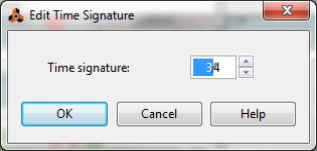
The available signatures are: 1/2-16/2, 1/4-16/4, 1/8-16/8 and 1/16-16/16. The Time Signature display in the dialog can be edited according to the descriptions in “Transport Panel segment displays”.
|
5.
|
There is no need to switch to Edit Mode unless you wish to change the time signature’s Static Value.
However, it is recommended that Snap is activated (and in most cases set to “Bar”) when you do this.