Reason Rack Plugin 12.7 Operation Manual
DAW
|
Rack Plugin
|
Reason+ Rack Extensions
Working in the Rack
#
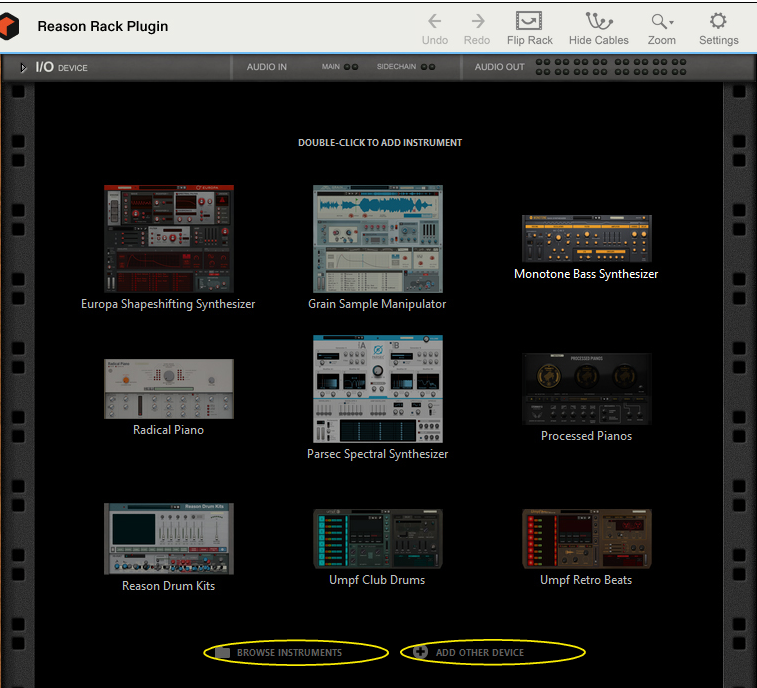
Creating devices
Devices can be created in a number of different ways.
Either:
Double click an instrument icon to add that device,
click "Browse Instruments" or “Browse Effects” to open the Browser with the corresponding palette shown,
or click "Add other device" to add another device from the context menu that appears.
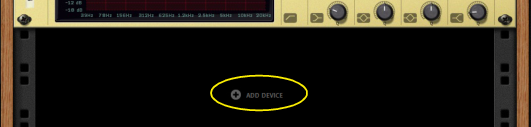
If there already are devices in the rack, click the Add Device button (or context-click in the rack) and select a device from the menu:
Select a device or patch in the Browser and click Create (or double clicking it the device).
•
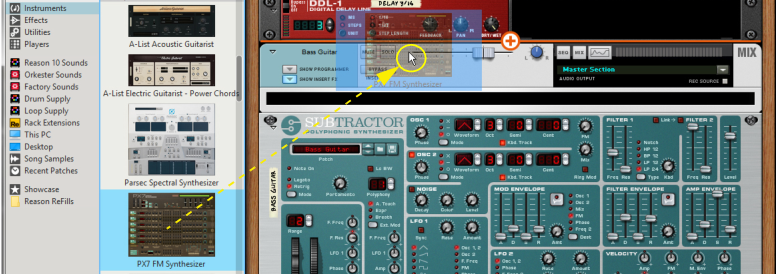
Drag and drop a device or patch from the Browser to the Rack.
As you drag a device or patch to the rack, a +-sign is shown together with an orange divider to indicate where the device will be placed:
Adding a PX7 FM Synthesizer device by dragging from the Instruments device palette and dropping in the rack.
When using drag and drop, pay attention to where you drop the device:
•
If you drop a device on top of an existing device in the rack, you will replace it.
•
Dropping a patch on top of a device means loading the patch (and possibly replacing the device), while dropping in the empty rack or below devices means creating a new device with that patch loaded.
#
Selecting devices
To select a single device, click on it in the rack.
The selected device is displayed with a colored border (based on the color scheme selected for your operating system).
To select several devices, hold down [Ctrl](Win) or [Cmd](Mac) and click on the desired devices.
Hold down [Shift] and click to make a continuous (range) selection.
To de-select all devices, click in the empty part of the rack.
#
Moving devices
A device can be dragged freely up and down in the rack without affecting the routings.
In this example an RV-7 reverb device is moved to two different positions:
#
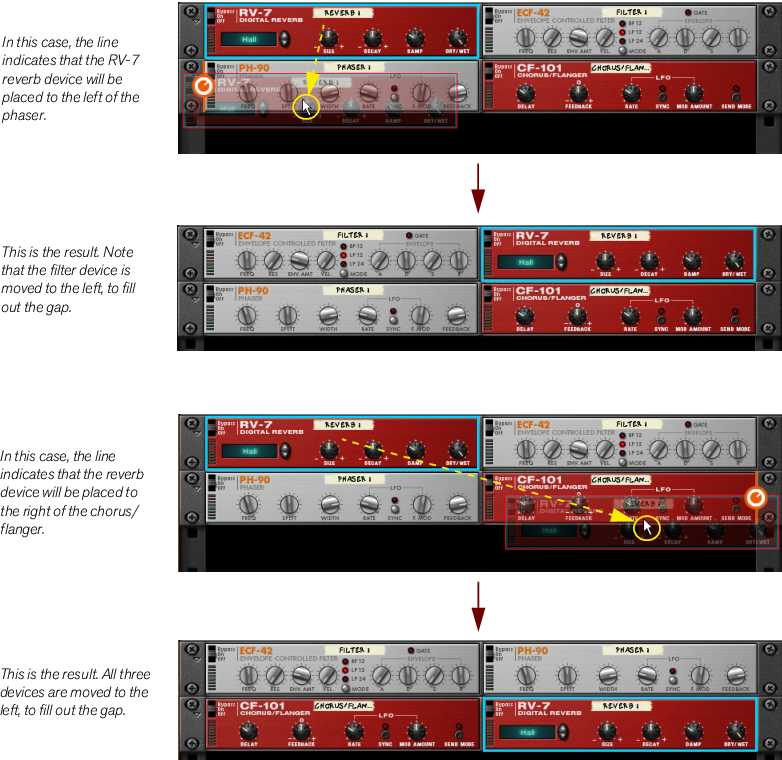
Re-routing devices
If you hold [Shift] and drag a device to a new position in the rack (as described above), it will be re-routed (as if you deleted it and created it in its new position).
This allows you to e.g. change the order of effect devices in a signal chain by Shift-dragging them.
See
“Auto-routing”
for more info on auto-routing.
#
Deleting devices
To delete a device, right-click it and select Delete.
If the deleted device was part of a chain, the signal chain will be kept.
•
You can also select multiple devices and then select Delete to remove them all in one go.
•
Deleting all devices in the rack will make the Popular Devices palette show.
The I/O device is fixed to the top of the rack and cannot be deleted.
#
Replacing devices
Drag and Drop a device on top of an existing device in the rack, to replace it.
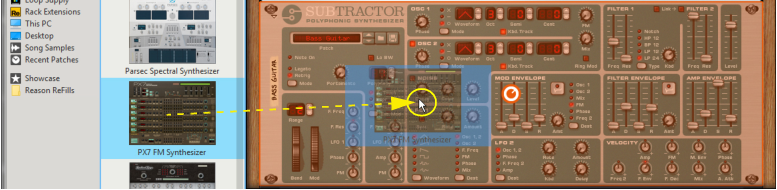
When dragging a device on top of another device in the rack, the panel of the existing device is shaded in orange:
Replacing a Subtractor device with a PX7 FM Synthesizer device by dragging from the Instruments device palette and dropping on the Subtractor.
#
Cut, Copy, Paste and Duplicate devices
These functions on the context menu affect the currently selected devices.
Note that you can also copy and paste devices between different Reason Rack Plugin instances in your DAW project!
#
Naming devices
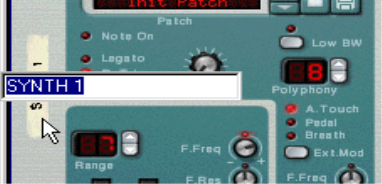
Each device has a "tape strip" which shows the name of the device. Normally, this is the name of the loaded patch (or the device type if it doesn't support patches), but you can rename it by clicking the tape strip and typing. This is especially useful if your rack contains several devices of the same type and you need to separate them.
To revert to the default patch name, double click the tape strip and delete your custom name.
The device name is also shown on the I/O device, if it's connected to one of the first 8 input pairs.